You wrote your first blog post.
Now what?
If you’re wondering how to get blog traffic as a beginner, when you’re starting from zero, you’re not alone. This guide will walk you through exactly how to promote your blog without feeling spammy or overwhelmed.
This is Day 6 of the 7-Day Get Started Blogging Challenge, and today we’re focusing on one thing:
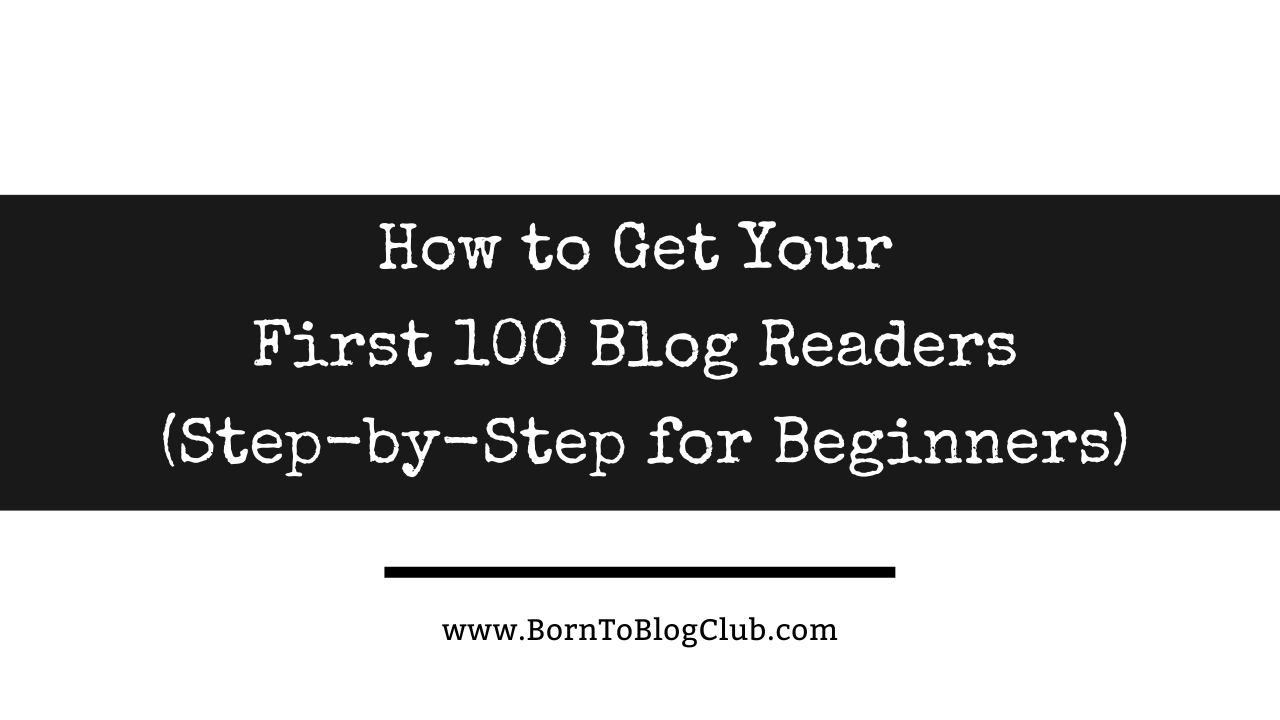
How to Get Your First 100 Blog Readers — using a simple Beginner Promotion Strategy That Works like Pinterest, Instagram, Facebook, X, and email marketing.
Most new bloggers publish their first post… and then wait.
But here’s the truth:
Your blog won’t grow if you don’t share it.
You don’t need to master every platform.
You just need to start.
Watch The Video:
Watch the video and keep reading to follow along below…)
If you’ve been wondering how to get traffic to a new blog post these are my BEST blog promotion tips for how to promote a blog post on social media and email marketing for bloggers! The EXACT strategy I used to get my first blog readers!
LINKS MENTION
- GODADDY RESELLER LINK to set up Managed WordPress + Domain Registration and Hosting etc…
🎬 Watch the full 7-Day Start Blogging Challenge + get the checklist here
👍 Like, subscribe @BornToBlogClub on YouTube and tap the bell so you don’t miss Day 7.
Chapters / Sections:
- Why Most New Bloggers Never Get Traffic
- Step 1: Share Your Blog Post on Pinterest
- Step 2: Promote Your Blog on Instagram
- Step 3: Share on X (Twitter)
- Step 4: Post to Facebook (Without Killing Reach)
- Step 5: Send an Email to Your List
- Why Sharing Sends Signals to Google
- Your Only Assignment Today
Here is the video transcript:
Why Most New Bloggers Never Get Traffic
- Most beginners don’t struggle with writing.
- They struggle with sharing.
- If no one knows your blog post exists, Google doesn’t either.
Sharing your link creates signals across the internet that tell search engines your content is active and relevant. - You don’t need viral traffic.
You need consistent signals.
So how do you get people to actually read your blog post that you wrote? Well, you gotta tell them about it. So if you want people to know that your blog post exists, you’re going to have to share it with them from social media to email marketing, which is what I’m going to teach you in this video. So we wrote a blog post yesterday and now I’m going to show you how to share it.
“If sharing your blog feels awkward — this will help.”
So if sharing your blog post feels awkward, this is going to help. And I don’t want you to think of promoting your blog post as bragging. It’s more of helping you as a blogger to get traffic to your blog post. It’s not really for family and friends. It doesn’t even matter if anyone necessarily clicks on the links by sharing this content out on social media and email list.
Google gets signals all throughout the internet saying, Hmm, this blog post is being shared everywhere. First, they know it exists, and second, they’re getting signals saying that people like it. So they don’t know that it’s you sharing the blog post. So it doesn’t matter if it’s you or if it’s family and friends.
It just matters that you actually shared it on social media. Out on the internet to your email list or wherever you’re going to share the link. You could even share it in a text message if you wanted to. And to be honest, most bloggers never even get people to read their blogs because they don’t share their work.
🎯 Goal:
Share your post for the first time
But today we’re going to fix that and I’m going to show you how to do it in just a few minutes or less. And you’re not supposed to master platforms today, I just want you to press share at least once on one of the platforms that we talk about.
Welcome to Day 6 of the 7-Day Start Blogging Challenge
And if you’re new around here, welcome to day six of my Get Started blogging challenge, where I’m showing you in one week how to start your own blog, make it live, and get your very first blog post published even if you’re starting at zero, which in case you missed some of the prior episodes, in the last couple episodes, I showed you how to set up your website and your blog with GoDaddy and WordPress hosting, and then how to actually write your first blog post. And then we came back and optimized it for SEO so that it would show up in search results and Google could find it.
And in this video I’m going to show you how to actually promote your blog post and get people to read it. So if you missed any of those, there’s an entire playlist that you can check those out as well as a download that you can pick up to go along with all these episodes in check, check, check all those little boxes off to make sure that you’re doing all the steps it takes to get started blogging from start to finish, link in the description below this video as well as on my website, BornToBlogClub.com. And if we haven’t officially met, I’m Blogging Brandi.
Okay, so now I want to show you how to actually share the blog post that we created, whether it’s your blog post or any blog post. I just want you to show you how to actually share what I mean by that. So if we went into our blog on Cattitude Chaos is where we did this for Johnny’s Cat blog and we had a list of all his favorite cat quotes.
So we would just go to his blog post and we’re going to see the URL for his blog posts up here in this little URL area. So this one is his website, CattitudeChaos.com, and then back slash my favorite cat quotes. And you can see it has spaces and dashes, and so that’s kind of natural where that comes from, that the website generates that and you can set that up. But all we’re going to do is take this link and when you share your blog post, you’re probably going to want to put a title in it. So ultimate List of cat quotes, funny, short and famous quotes for cat lovers. So we’re going to take this title. The most important thing is this link, but we’re going to borrow this title real quick.
Step 1: Share Your Blog Post on Pinterest
And so let’s go over to Pinterest and you can see kind of what pins Johnny’s already created. But we just want to create a pin. So we want to go to Pinterest. We want to say create a pin. The first thing you always have to do on Pinterest is add a photo. So we’re going to add a photo here, and I already created a pin, but you could use your blog post photo.
It’s going to look a little bit. Uh, different because you can see that Pinterest pins are obviously long form versus your blog posts. If you go into Canva, that’s where I created this. So you can create all kinds of social media little templates, but I just went into Canva and then I typed in a pin for Pinterest, and so I could do a Pinterest pin.
I just created this pin real quick in Canva and then I uploaded it over here to Pinterest. I’m going to add the title here, and then you’re going to want to add a description. For right now, we’re just going to copy the same thing. And then we want to add this URL link right here. This is the most important part. So then we go back over to Pinterest, we come back down here and it says link.
So you’re going to add your link right here, and then you can choose a board and you can choose tags and all kinds of things that you can do here. So you can say cat life, cat quotes, we already have a board for that. And then cat quotes, I don’t know if those are in here or not, but we can just put cat or animal quotes was one that just came up.
So we’re just going to put that in here. You can always add stuff later. You can schedule this to publish later, but we’re just going to publish it now so that we just have a link here back to our blog post. And I just want to show you what it’s looks like. Schedule. We don’t want to schedule. Whoops. So we just want to hit publish now.
So we’re going to hit publish, and now it says, do you want to view it so we can go view what it looks like? And so now you can see that it’s here, and if you go to this visit site link, it’s going to take you over to the actual blog post itself on Johnny’s website. And so now this is a link out on Pinterest. If you go back over to our profile.
We will be able to see this for created pins. So now you can see we created this pin and he’s created a lot of different pins, but this one specifically goes back to our website and then I’ll usually like it or leave a comment on it and say, save this pin, you know, or something like that. But you just comment on it to show Pinterest there’s some activity.
And you can highlight it. So that’s on Pinterest, so that’s easy peasy. You’re done with Pinterest.
Step 2: Promote Your Blog on Instagram
And then you can also do the same exact thing. You’re just going to go over, and you can almost do this all at the same time, but it just depends what platforms you’re going to do this on. For Instagram, it’s going to be a little bit different. You’re going to have to say, go look at the link in my bio, because when you share on Instagram, you can’t share the links.
So if you notice on Instagram links don’t highlight only the profiles themselves do. So you have to say that the link is in the bio, and that’s how I upload these. So it’s the same things. You’re just going to hit create and you could do a post. And then it’s going to ask you for the photo that you’re going to add, so you do the same exact thing and you can crop it.
I just hit next. This is going to say, this is the link, but this, we’re not going to share this. Really here because it’s not going to make sense. It’s not even going to highlight, but you can put it there and you can say link in your bio. But we just could say ultimate list of cat quotes. So we can say, Hey, check out our ultimate list of cat quotes.
Funny short, for cat lovers, link to website in bio. And so you can add this in here, but it’s just not going to highlight that’s the thing, and then you would just hit share and you could share this, but it’s not going to share the link. It’s not even going to tell the internet that the link exists. So the best way to do that is to actually add the link into your profile on Instagram.
See this showed up right here, and you can see how it looks. So you can just say, Hey, check out our ultimate list of cat quotes, and then we said, link to website in bio. So it looks kind of janky. I would’ve put hashtags in it and everything else, but it’s there. Okay. And we can go back. We can delete it.
If we want, and it doesn’t have to stay there so we can delete the cat quote if we don’t like it. That’s why I said you, you have this link right here and it’ll take you to the website, but you could change that link to the blog posts. But that’s a little bit more work when you’re doing it on Instagram.
So you could share it in a story in all kinds of other ways, because you can actually add a link in your story.
Step 3: Share on X (Twitter)
You can also do the same thing over here on Twitter. If you wanted to share your post, you can just say ultimate list of cat quotes and share the link. I would add hashtags and that way people would actually find it. So this will pull up a photo, but you could add this in here.
And you’re just going to post this on your profile. And so now it says your post is sent. We’re going to view it. So now you can see this link’s back to the website. And again, it’s just taking you back. So there’s another link out there sharing to Twitter, and I’ll go in there and like it.
But you could add the link down here in a reply. There’s different ways to do this. And you could pin that if you wanted to. You could pin it to the top of your profile.
Step 4: Post to Facebook (Without Killing Reach)
Then the other place you might want to share it would be Facebook. So maybe you come over to Facebook. Now, the thing about Facebook is you don’t really want to put links in the actual description, but you can say link in comments. I like to put the link in the comments that way facebook doesn’t suppress your actual post, but get your little photo that you made.
I would put a hashtag in here and then I would hit next and I would share this public. Once you share this, then you’ll see over here that now you need to go add the link. So I would just add the link right here and just put it in your comments. And on Facebook, I always like the post and I’ll go down here and like this little comment with the link.
And again, you can click over and see the link. Same thing with LinkedIn and any other social media platform. They’re all a little bit different.
Step 5: Send an Email to Your List
And then of course, I can also send an email, so I could just send a regular Gmail. I have an email list set up, which I’ll show you how to do on the born to blog club.com in MailChimp, and it’s free at least as of right now, of this taping for your first like 250 ish contacts, and right now you can set up what’s called a RSS feed.
So if you’re just getting started, you can set this up and it’ll send out a little email every time you have a blog post, go out and you don’t even have to do anything. So every time I post a blog, this email actually goes out to all of my people, and I just set that up right here in MailChimp. I’ve already set up this RSS feed for MailChimp, but you can also just go over, once you’re in MailChimp and set up an account, you can go over to your campaigns and set up and create an email in here. So you just go through here and it’ll walk you through the steps to actually design an email, and it’ll look like this when you’re done.
So it’s not hard at all to do this, to go through and just design an email with MailChimp. You can design your email, you can customize it. You just go through and, and pick something and apply it and set up your email. And so you can add a little button down here. You could add your little website link, let them know that they need to go to your website, and you would put a little photo in here.
You could use the same photo. The one from your blog post, or you could use your Pinterest pin. And so this is literally just how I would do this. I would go in here, I would set this up, and then tell people to go read these cat quotes. So I’ve got a whole list of these cat quotes that I want them to know about, and this is so easy to do.
And if I mess up, I just go back. But you’re just going to go into these little blocks, let them know that they can go read. These cat quotes. So you obviously you’re going to want to customize this a little bit more, but you could go in here and have this set up to send out and it’s going to look like this one that I was sending out.
So I added a header and my announcements and everything and it, it’s going to take time. You can customize all the little social media, all this more and more, and you’ll get better at it and faster at it and it’ll be easier. But this is a quick, easy way. You can send a test email, see what it’s going to look like.
But even if I’m in MailChimp, all I have to do is just go back in here. I can save as a template. I can change the template. I can hit save and exit, and I can come back. I can view what it’s going to look like before it goes out and click the links and make sure that everything’s going to work. Now, obviously I’d want to say instead of add button, I’d say click here.
But you can see even from the MailChimp email, it takes us back to the blog post. So whether it’s set up for RSS to go out automatically, or you send it individually from MailChimp, it’s pretty self-explanatory. So you’ll add your subject line in here, and your subject line could just be ultimate list of cat quotes.
So you would just add these little details in before you send it. And you don’t have to get too specific, but you’re going to see, you could send yourself a little test email right here and look at what it’s going to look like before it actually goes out. So you would just. Go through here. Choose all your little settings. Then you’re going to hit send and you’ll send this out.
Why Sharing Sends Signals to Google
Once you share your blog post from your blog, you’re going to go over here, click on your blog post. You can use the content from your blog post to help create your social media posts. But at least use your title, a couple hashtags, and then make sure that you use this link and share it. That’s the most important thing, is to actually share this link on social media, on email, and send all these little pings and signals to Google, to from the internet, and letting the internet know, Hey. Have you seen this blog post yet? Oh wow. No, I haven’t. And so it is just all these little signals telling Google and the internet that this blog post exists and that you need to go read it, and then people are sharing it.
So you don’t have to pick all of the social media platforms or emails.
How Sharing Helps SEO
When you share your blog link:
- Search engines discover it faster
- It creates backlinks and signals
- It builds early authority
- It increases chances of ranking
Even if only 3 people click.
Momentum matters more than perfection.
“This is not mastery. This is momentum.”
Day 6 Action Step: Your Only Assignment Today
Share your blog post ONE time today.
Not perfectly. Not everywhere.
Just once.
Comment below and tell me where you shared it 👇
Pinterest, Instagram, X, Facebook, Email?
“Share your post in ONE place today — then walk away.”
Today’s action all I want you to take is share your blog posts on one platform and then walk away. I know that sharing feels awkward and it’s because you care. It’s this little piece of work that you put together and you’re about to push it out into the world, and you’re worried what people might say if they’re going to click on it or click away if they’re going to read it or not.
It’s really, really important that you share your blog posts link with the rest of the world, no matter if anyone reads it or not, it has to do with signals and back linking to your blog post. So even if it feels weird, I just want you to do it, and tomorrow I’m going to show you how to actually make money from your blog. Yay.
REVIEW: How to Promote Your Blog (Beginner Strategy)
Here are simple places to share your blog post:
1. Pinterest
Create a pin in Canva and link directly to your blog post.
2. Instagram
Post your image and say “Link in bio.”
Or share it in Stories with a link sticker.
3. X (Twitter)
Post your title + link + 1–2 hashtags.
4. Facebook
Post your image and add the link in the comments.
5. Email
Send your blog post to your email list.
Or set up an RSS feed so posts send automatically.
You do not need to master every platform.
Today’s assignment:
Share your blog post one time.
Blogging Challenge Series
If you’re excited about this video in this Get Started blogging challenge my seven day series, showing you how to start a blog from start to finish, step by step and get everything set up so you don’t have to worry about anything, you’re not ever going to think it anymore, let me know by dropping a comment below.
Let me know what questions you have if we haven’t officially met, I’m Blogging Brandi. If you missed any of these episodes, don’t worry. I’ve put them in a playlist that you can pick up in the description below this video as well as on my website, BornToBlogClub.com, and there’s a download and a little checklist for you to follow along that you can make sure you’re not missing any of these episodes.
Go back, rewind this. If you need a little bit of a reminder, check out the other videos in the playlist.
Watch The Full 7 Day Get Started Challenge:
- Day 1 – What Blogging Really Is (& Why Most Bloggers Quit)
- Day 2 – What To Blog About (How To Choose A Profitable Blog Niche)
- Day 3 – How To Build Your Blog Website (WordPress Beginner Tutorial)
- Day 4 – How To Write Your First Blog Post
- Day 5 – How to SEO Your Blog Post
- Day 6 – How to Get Your First 100 Blog Readers
- Day 7 – How To Make Money Blogging
As well as hitting the like button below, subscribing to my channel and tap in that bell icon so you’re notified when I publish the next video, and I’ll see you in tomorrow’s video. Love you.
“Tomorrow I’ll show you how this turns into income.”
If you haven’t already:
Related Reads You Might Also Like…
- How To Set Up Social Media Accounts for Your Blog (the right way)!
- How To Set Up X (Formerly Twitter) To Drive More Traffic To Your Blog
- Complete Guide: Pinterest for Bloggers 101 (getting started & driving traffic to your blog)
- Ways to Get More Traffic to Your Blog (1,000+ Visitors Per Day Even If You’re New to Blogging)
👩💻 Feeling Called to Start a Blog? Here’s Exactly How I’d Begin… WATCH THIS FIRST
FAQ
How do I get traffic to a new blog?
Start by sharing your blog posts on social media — on at least one platform consistently. Pinterest, X, Facebook, Instagram, and email marketing all send signals that your blog exists. Even small signals help search engines discover your content.
How long does it take to get 100 blog readers?
It varies, but consistent sharing and SEO optimization can help you reach 100 readers within your first few weeks or months.
Do I need social media to grow a blog?
You don’t need every platform, — but when you’re new, sharing your blog posts on social media helps search engines discover your content faster.
What is the fastest way to promote a blog post?
Share your blog post link directly on Pinterest, X, Facebook, or to your email list. Direct linking creates immediate signals. Pinterest and email marketing are two of the simplest ways to drive early traffic.
#BloggingForBeginners #BlogPromotion #HowToGetBlogTraffic #BlogTraffic #StartABlog
Join the 7-Day Blogging Challenge
If you’re feeling called to blog, don’t ignore it. Join the Born To Blog Club and start the 7-Day Blogging Challenge. I’ll walk you through it step by step. This is your sign.